Compatible: (5.7L/6.1L/6.4L)
2005 - 2023 Chrysler 300
2006 - 2023 Dodge Charger
2008 - 2023 Dodge Challenger
2006 - 2023 Dodge Durango
2003 - 2010 Dodge Ram 1500/2500/3500
2011 - 2023 RAM 1500
2011 - 2023 RAM 2500
2011 - 2023 RAM 3500
2005 - 2023 Jeep Grand Cherokee
Socket Size:
10mm 12pt, 9/16 12pt
The design of automotive bolts is a complex process, involving a multitude of factors. These include the determination of operating loads and the establishment of geometric configuration. The process for connecting rod bolts is described in the following paragraphs as an example.
The first step in the process of designing a connecting rod bolt is to determine the load that it must carry. This is accomplished by calculating the dynamic force caused by the oscillating piston and connecting rod. This force is determined from the classical concept that force equals mass times acceleration. The mass includes the mass of the piston plus a portion of the mass of the rod. This mass undergoes oscillating motion as the crankshaft rotates. The resulting acceleration, which is at its maximum value when the piston is at top dead center and bottom dead center, is proportional to the stroke and the square of the engine speed. The oscillating force is sometimes called the reciprocating weight. Its numerical value is proportional to:

It is seen that the design load, the reciprocating weight, depends on the square of the RPM speed. This means that if the speed is doubled, for example, the design load is increased by a factor of 4. This relationship is shown graphically below for one particular rod and piston.
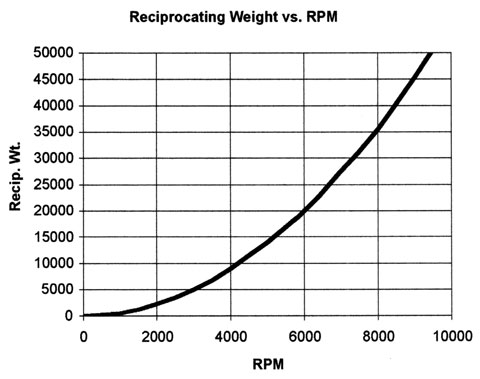
A typical value for this reciprocating weight is in the vicinity of 20,000 lbs. For purposes of bolt design, a “rule of thumb” is to size the bolts and select the material for this application such that each of the 2 rod bolts has a strength of approximately 20,000 lbs. (corresponding to the total reciprocating weight). This essentially builds in a nominal safety factor of 2. The stress is calculated according to the following formula:
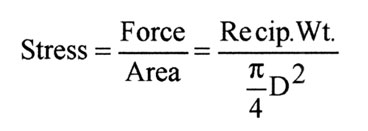
so that the root diameter of the thread can be calculated from the formula:

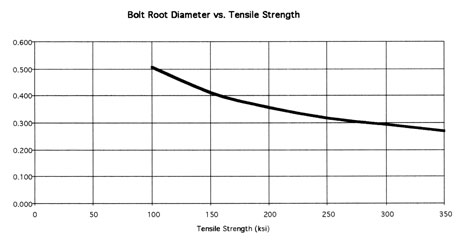
This formula shows that the thread size can be smaller if a stronger material is used. Or, for a given thread size, a stronger material will permit a greater reciprocating weight. The graph shows the relationship between thread size and material strength.
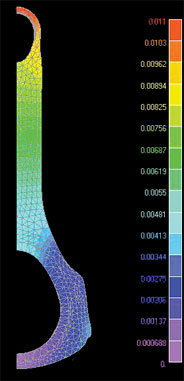
It must be realized that the direct reciprocating load is not the only source of stresses in bolts. A secondary effect arises because of the flexibility of the journal end of the connecting rod. The reciprocating load causes bending deformation of the bolted joint (yes, even steel deforms under load). This deformation causes bending stresses in the bolt as well as in the rod itself. These bending stresses fluctuate from zero to their maximum level during each revolution of the crankshaft.
The next step is to establish the details of the geometric configuration. Here the major consideration is fatigue, the fracture that could occur due to frequent repetition of high stresses, such as the bending stresses described above. Several factors must be considered in preventing fatigue; attention to design details is essential.
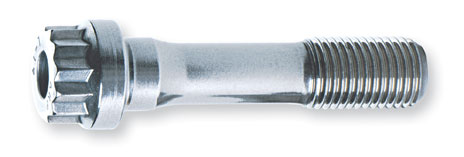
Fatigue failure is frequently caused by localized stress risers, such as sharp corners. In bolts, this would correspond to the notch effect associated with the thread form. It is well known that the maximum stress in an engaged bolt occurs in the last engaged thread. By removing the remaining, non-engaged threads, the local notch effect can be reduced. This leads to the standard configuration used in most ARP rod bolts: a reduced diameter shank and full engagement for the remaining threads. Providing a local fillet radius at the location of the maximum stress further reduces the local notch effect. Thus this configuration represents the optimum with respect to fatigue strength.
The reduced diameter shank is helpful in another sense. It reduces the bending stiffness of the bolt. Therefore, when the bolt bends due to deformation of the connecting rod, the bending stresses are reduced below what they would otherwise be. This further increases the fatigue resistance of the bolt. A typical bolt configuration is shown below.
Once the bolt configuration has been established, the manufacturing process comes into play. This involves many facets, which are discussed in detail elsewhere. Here, however, one process is of primary interest. With respect to bolt fatigue strength, thread rolling is a major consideration. Threads are rolled after heat treating. This process, which deforms the metal, produces a beneficial compressive stress in the root of the thread. It is beneficial because it counteracts the fluctuating tensile stresses that can cause fatigue cracking. If heat-treatment were to occur after rolling, the compressive stresses would be eliminated. This would therefore reduce the fatigue resistance of the bolt.
An additional factor must be taken into account in defining the bolt configuration: the length of engaged thread. If too few threads are engaged, the threads will shear at loads that are lower than the strength of the bolt. As a practical matter, the thread length is always selected so that the thread shear strength is significantly greater than the bolt tension strength.
This problem is especially important in bolts used in aluminum rods because of the fact that the shear strength of aluminum is much lower than the shear strength of steel.
Finally, although not a design parameter, the subject of bolt installation preload must be addressed. It is a fundamental engineering concept that the force in a bolt in an ideal preloaded joint will remain equal to the preload until the externally applied force exceeds the preload. Then the force in the bolt will be equal to the external force. This means that fluctuating external forces will not cause fluctuating forces in a preloaded bolt as long as the preload exceeds the external force. The result is that fatigue failure will not occur.
In a non-ideal joint, such as in a connecting rod, the bolt will feel fluctuating stresses due to fluctuating rod distortions. These are additive to the preload, so that fatigue could result. In connecting rods, precise preloads are required because if they are too low, the external forces (the reciprocating weights) will exceed the preloads, thus causing fatigue. If they are too high, they provide a high mean stress that combines with the fluctuating stresses due to rod distortion. Again, fatigue is promoted. The objective, then, is to preload a bolt so that it just exceeds the external load, and no higher.
To sum up: both insufficient preloads and excessive preloads can lead to fatigue failures.
Appropriate preloads are specified for each ARP bolt. These preloads can be attained in a connecting rod by applying proper torque using a torque wrench or by measuring the amount of stretch in the bolt using a stretch gauge (it is known that a bolt stretches in proportion to the tension in it). The torque method is sometimes inaccurate because of the uncertainty in the coefficient of friction at the interface between the bolt and the rod. This inaccuracy can be minimized by using the lubricant supplied by ARP.
Other factors, equally as important as design, include material selection, verification testing, processing, and quality control. These aspects of bolt manufacturing are discussed elsewhere in this document.
The foregoing discussion concentrated on the design of bolts. The same considerations apply in the design of studs
BY RUSSELL SHERMAN, PE
Metals freeze from the liquid state during melting from many origins (called allotropic) and each one of these origins grows until it bumps into another during freezing. Each of these is a grain and in castings, they are fairly large. Grains can be refined (made smaller); therefore, many more of them can occupy the same space, by first cold working and then by recrystallizing at high temperature. Alloy steels, like chrome moly, do not need any cold work; to do this – reheat treatment will refine the grain size. But austenitic steels and aluminum require cold work first. Grain size is very important for mechanical properties. High temperature creep properties are enhanced by large grains but good toughness and fatigue require fine grain size-the finer the better. (High temp creep occurs at elevated temperature and depending on material and load could be as much as .001 per inch/per hour.) All ARP bolts and studs are fine grain – usually ASTM 8 or finer. With 10 being the finest.
With steels, as the strength goes up, the toughness decreases. At too high a strength, the metal tends to be brittle. And threads accentuate the brittleness. A tool steel which can be heat-treated to 350,000 psi, would be a disaster as a bolt because of the threads.
The man’s name was Rockwell and he developed a means of measuring hardness of metals which was superior to other methods. A Rockwell hardness tester measures the depth of penetration into the metal when a load is applied. For hard materials, a diamond penetrator is used. For soft material, small balls are used – 1/16” or 1/8˝ diameter-and the machine measures the depth. We use the C scale for the 120,000 psi strength level and above. The C scale uses the greatest load – 150 Kg. The A scale uses only a 60 Kg. load but can be correlated with C. It is necessary to use the A scale for thin sheets because using the 150 Kg load would cause the diamond to penetrate almost all the way through.
Some parts are too small to be Rockwell hardness tested. They are placed in hard plastic and a microscope is used to place a small indenter into the metal. Using the microscope the length of the impression is measured.
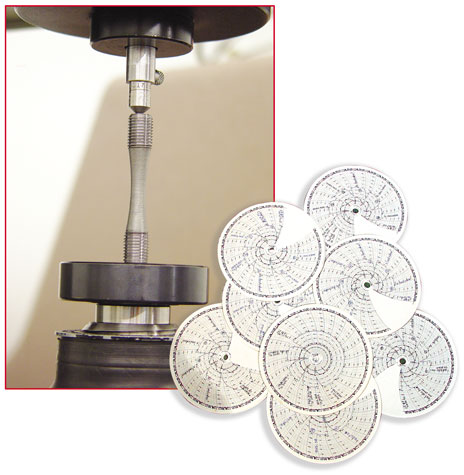
The modulus of elasticity of all alloy steels is exactly the same – 30,000,000 psi. This is true whether it is heat-treated or not – whether it is 100,000 psi strength level or 300,000 psi. Metals are like a spring – put a load on them and they will stretch – double the load and they will stretch double. This is important in connecting rod bolts because by measuring the stretch we really are measuring the load. Load is what is important and measuring stretch of a given size and configuration bolt will indicate how much load is stretching the bolt.
The strength of all alloy and carbon steels is derived from the metal carbides formed during the mill processing. The carbon in steels combines with iron, vanadium and with chromium, as well as many other metal alloy additions to form compounds, which are a very hard phase within the iron matrix. Tool steels generally have high carbon content (above .8%) and can be made very hard – but brittle.
Chromium is a metal and is typically used for plating because it is shiny. It is also used as an alloy addition to iron to form a stainless steel. A stainless steel must contain at least 12% chromium, but these lean chromium steels can still show some rust on the surface. Using 18% chromium will make a more rust resisting stainless. Exposing any stainless to oxygen at temperatures above 1200˚F will cause the chromium to join the oxygen and therefore leave the surface depleted in chromium if it falls below 12% the surface will show rust.
When the fracture face has a rocky appearance it is because the material had a very large grain structure. Basically the grain grew during manufacturing due to poor technique and handling. A properly processed part will have a silky smooth appearance which is an indication of fine grain size. So crystallization does not occur as a result of load or fatigue – it was present in the material at the time of manufacture.
The precipitation hardening comes from microscopic precipitation of hard phases which serve to keep rows of atoms from moving under stress. Some metals undergo a change in atomic structure at high temperature. Alloy steels, which are bcc at room temperature, become fcc at temperatures above 1400°F. This switch over is called a phase change. When cooled down they revert back to the bcc structure. Management of this phase is extremely critical and ARP maintains a complete in-house heat-treatment facility. It’s the only way we can assure material integrity.
A face centered cubic arrangement of atoms (austenitic) looks like a Las Vegas die with a five showing on all six faces. This can’t be seen visually by any type of microscope.
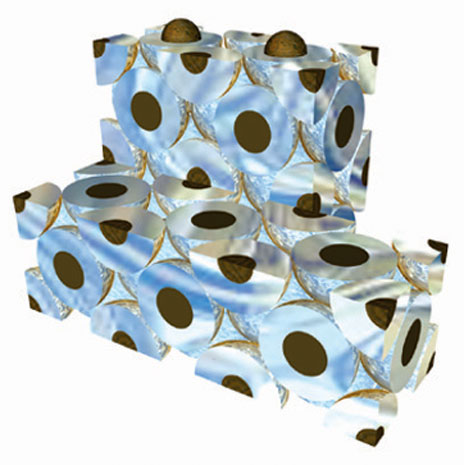
The number of atoms in any one cubic cell would be 14 – these do not stand alone but are attached to other cells which share some of the atoms.
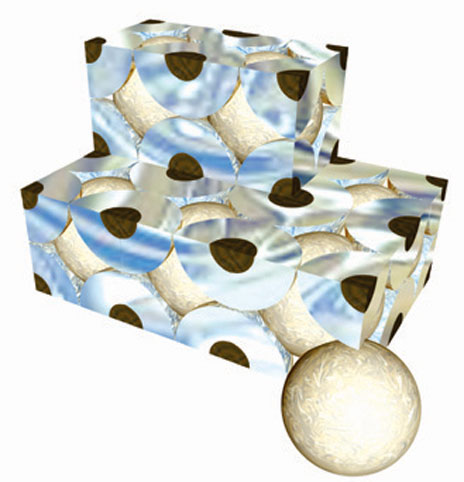
The body center cubic structure would look like a die with a four on all faces and one atom in the center of the cube. The atomic arrangment of pure iron is bcc at room temperature and does not change until the temperature reaches 1674˚F. At this temperature it changes to austenite which is face center cubic (fcc). The addition of carbon to the iron lowers this transition temperature. This is the basis for heat treatment of steel. If the iron carbon alloy (steel) is quenched from the fcc field, the structure becomes martensite, a very hard strong condition.
A face centered cubic arrangement of atoms Stainless Steel 300 series is not heat-treatable. But heavy reduction (power dumping), in the cross section, during forging causes a dramatic increase in strength. This is the process ARP uses to make 304 Stainless Steel reach 170,000 psi UTS.
All grains or crystals are composed of atoms bound together in a definite pattern. These structures are called space lattice or crystal structures. At a fixed temperature, the atoms in an array are spaced a definite distance from one another, although they vibrate about their mean position. Even though atoms are actually not held together in this manner, it is helpful to picture the crystals as a 3-dimensional latticework connected by imaginary lines. Metallurgists who primarily study ferrous metal are interested in only two basic crystal structures: bcc (body-centered cubic) and fcc (face-centered cubic).
Cold heading is a more efficient process and allows the part to be cold worked. The temperatures used for hot forging will reduce the effect of work hardening. This is important for metals which derive much of their strength from the cold work. Cold heading produces a better product than hot heading. The number and force of the blows of the cold heading machine can make a significant difference in the quality of the end product. Excessive numbers of blows can lead to voids in the bolt head. ARP, in fact, holds significant patents on cold heading procedures for the higher nickel and cobalt based alloys.
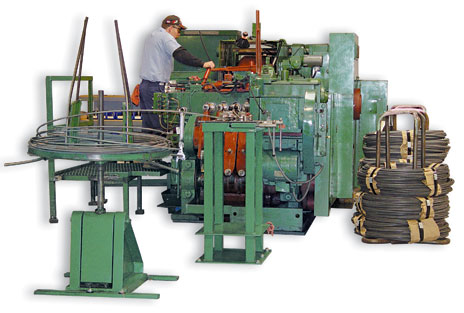
Our patented process begins with a softer wire that can be cold forged. The process work hardens the head and the under head area to the desired hardness. We then power extrude the front end to achieve the reduction and hardness in the shank resulting in a bolt with even strength and hardness from end to end.
In a typical aerospace manufacturing process, these alloys are hot headed from bars, reduced in diameter from 48 to 50% by cold drawing, resulting in a hardness of about Rockwell C46 which is too hard for cold heading. So, the blanks are locally induction heated in a very narrow temperature envelope and hot headed. The process reduces the hardness immediately in the area under the head approximately 3 to 5 points on the Rockwell C scale. Subsequent heat treatment does not restore this partially annealed area to full hardness and strength. The final result is a relatively soft-headed bolt. Therefore, this process is not used by ARP.
Bars produced by the mill in straight sections are normally shipped in 12 foot lengths. Wire is supplied in continuous coil form and is hundreds of feet in length. Bars are cut to length and the bolts are hot forged from these lengths. Wire on the other hand is fed into a cold header in a continuous manner.
A286 is a 25% nickel and 18% chromium alloy with smaller amounts of titanium and aluminum, which precipitate during aging – after solution treatment. It is a true stainless steel due to the high chromium and it is austenitic due to the high nickel. A286 was developed as a high temperature alloy for use in pre-jet aircraft engines. The strength level was only 140,000 psi, but it had good high temperature strength and exceptional toughness, making it an excellent fastener alloy.
Rocketdyne became interested in it for rocket engines being developed in the early 60’s. But they required higher strength. We were part of the team that developed a thermo-mechanical method to produce a strength level of 200,000 psi. This involved severe cold reduction after solution treatment and before aging. An aerospace material spec (AMS) was then written requiring this treatment for 200,000 psi strength level. There is no other steel alloy, at this level, which can match A286 for corrosion resistance, toughness or bolt fatigue strength.
This is a term used to define the heavy extrusion of the fastener body during forging. The part is forced into a die much smaller than the blank thereby causing a severe reduction in cross section area. This reduction of the cross sectional area is accompanied by an increase in length because metals can’t be compressed. However, power dumping or reduction, delivers a significant increase in strength properties and is part of the patented process we use to produce fasteners from 304 stainless steel with 170,000 psi UTS and AMS 5844 (ARP 3.5) with ultimate tensile strengths in the 270,000 psi UTS range with outstanding fatigue.
Both are alloy steels with similar chemistry. The 4130 has only .3% carbon and can’t be hardened as high as 8740, which has .4% carbon. Also, 8740 has about .45% nickel and 4130 has none. Both have moly (most alloy steels have moly). The chromium content of 4130 is slightly higher, .95% instead of .55%. However, 8740 is generally considered to have slightly better toughness due to the nickel.
ARP2000 is a heavily alloyed martensitic quench and temper steel, initially developed for use in steam power plants. As such it has excellent stability at high temperatures. But most important, ARP research discovered that in addition to temperature stability it has excellent notch toughness in the higher strength ranges and is alloyed to be tempered to Rc44/47. 8740 and 4340 can be tempered to the same hardness. But, the tempering temperature would yield material in the “temper brittle zone” (between 500° and 700°F), producing significant notch sensitivity. ARP2000 is tempered above that temperature range and has a strength between 200,000 and 220,000 psi.
L19 differs from ARP2000 in that it is a vacuum melted alloyed steel with sufficient chromium and carbon to achieve high hardness (but below the level of a stainless steel). L19 is air-cooled from the hardening temperature in a way that does not require an oil quench to achieve full hardness and is tempered to assure full conversion to martensite between 1025°F and 1075˚F. L19 is a proprietary material capable of achieving strengths of 220,000/230,000 or 260,000/270,000 psi as may be required. Both L19 and ARP2000 steels are modified bcc (martensite) at room temperature. L19 has the same advantage as ARP2000 in that a high strength is obtained at a high tempering temperature. This alloy is easily contaminated and requires special handling.
Both of these alloys are considered multiphase, non-steel, austenitic materials. Both derive their strength (260,000 psi) from severe cold work (48/50%) which raises the hardness from Rockwell C 46 up to 49/50. The AMS5842 (for MP159) was developed much later than AMS5844 (for MP35) in order to increase the usable service temperature by about 100° so it could be used in hotter sections of jet engines.
All alloy steel fasteners are essentially manufactured by the same process. Incoming steel from the mill is forged to specification, then heat treated and thread rolled. Regular AN bolts are forged to size and are normally not precision ground. They may even have threads on them when heat treated.
Expensive aerospace fasteners are more likely suited for some motorsport applications. These fasteners require precision forging, careful heat treatment and then precision grinding, fillet rolling under the head and a great deal of skill in thread rolling.
Non-stainless steels have low moisture tolerances because the water attacks the steel by forming iron oxide (rust). Therefore none of these have a high tolerance for moisture and the surface must be protected by oil or plating. ARP maintains an in-house plating facility to assure all non-stainless product is delivered 100% corrosion free.
A standard fastener is one that can be referenced from a nationally or internationally recognized standards document and may be produced by any interested manufacturer.
In all fastener categories the custodian of each group (MS-AN-NAS) have tried to standardize the processing of specifications such as AS (American Standard) heat-treating, MIL-H-6875 cadmium plating, AMS QQ-P-416 passivation and AMS QQ-P-35 testing, MIL.-Std 1312 and NDT in aerospace applications are generally by sample.
ASTM stands for the American Society for Testing Materials, a large industry funded group used to write standards for many materials and testing procedures. It compares directly to AMS (Aerospace Material Standard).
In the case of ARP, 100% raw material is purchased to AMS specification – with the exception of special alloys used in proprietary products. All materials are carefully examined for proper chemistry – and finally, periodic examination by an independent laboratory. ARP consistently strives to exceed industry specifications for quality and product management.
MS (Military Standards): MS bolt specifications cover a wide range of fastener hardware, high strength bolts, nuts and washers with spec’s for materials and processing. MS fasteners have various tensile strengths.
AN (Army-Navy) Specifications: Generally lower strength bolts and studs primarily in the 125 psi UTS range. AN also covers a wide range of nuts, washers and other hardware.
NAS (National Aerospace Standard): These specifications cover fasteners in the strength ranges 160,000/180,000/200,000 psi UTS.
ISO (International Standards Organization):
ISO 9001-94: is a quality control system designed for manufacturers with design control.
ISO 9002-94: is a quality control system designed for manufacturers who build parts to customer specifications, and do not have design control.
ISO 9001-2000: is current ISO system well suited for manufacturers with engineering design functions, drawing control and statistical techniques to achieve demanding quality requirements.
This system is the main focus of ARP’s World Quality Concept.
The most common cause of failure of connecting rod bolts (and wheel bolts) is too little induced load (stretch) during installation. This allows the alternating load to impose cyclic loading on the bolt. Over tightening is also another cause, because the induced stress is too close to the yield point.
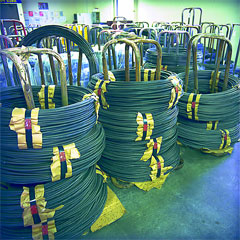
In order to ensure optimum quality control, ARP has grown to be exceptionally self-reliant and now controls all aspects of the manufacturing process. All operations are performed in-house and closely monitored. This is how ARP has been able to establish a reputation for “zero defects” quality throughout the industry.
The process begins right at the mill, where ARP orders only premium grade materials including several proprietary alloys. The ever-popular 8740 chrome moly steel, for example, comes from the mill in four distinct grades. The lowest is “commercial,” which is followed by “aircraft quality.” ARP uses only the top two grades (SDF and CHQ), which cost twice as much, but provide the foundation for defect-free fasteners. These materials come in bar stock (for studs) and huge coils (for bolts).
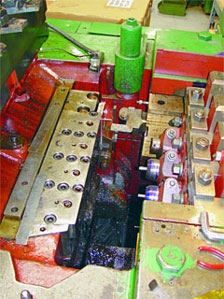

Transforming raw material into a fastener begins with “hot” and “cold” heading processes. Material is fed into powerful devices and cold forged, or induction-heated and formed under tons of pressure.
Heat Treat & Shot Peening
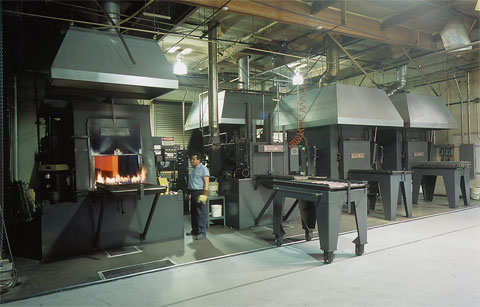
Following the basic shaping, material is heat-treated to desired levels. This crucial process is done entirely in-house to assure total quality control. ARP uses special vertical racks to hold each piece individually and assure complete 360° penetration. This is far superior to commonly-used methods of dumping items into a large bin and batch-treating.
Fasteners are shot-peened after heat-treatment to remove any surface irregularities and improve overall external integrity.
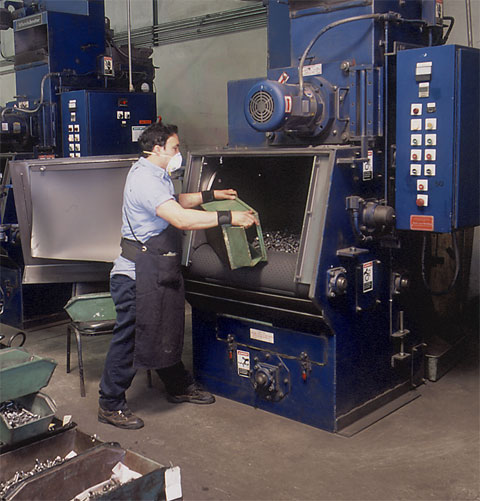
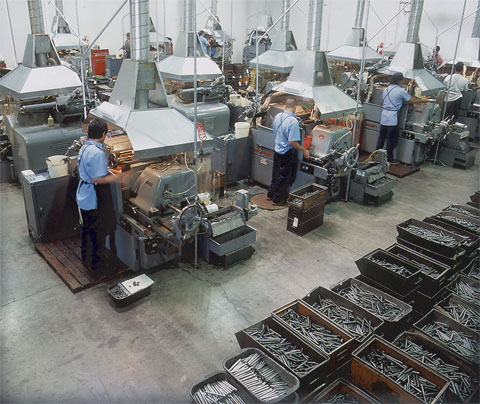
The Grinding Department is where all studs are centerless ground to ensure that they are perfectly concentric. As many as ten machining steps are required to achieve this level of accuracy.
Thread Rolling
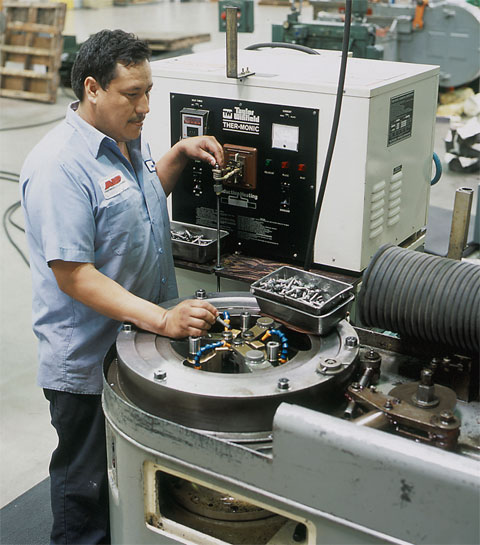
The thread rolling operation (to MIL-S-8879A specs) is done after heat-treat, which accounts for a fatigue strength up to ten times higher than fasteners which are threaded prior to heat-treat.

ARP manufactures nuts in a multi-step process that begins with raw material being fed into a giant forming device that “blanks” the hex and 12-point nuts and continues with highly sophisticated automated threading equipment tapping each nut with an accuracy of .001˝ (which is five times higher than the aerospace standard). This ensures an exceptionally close-tolerance fit between the bolt/stud and nut.
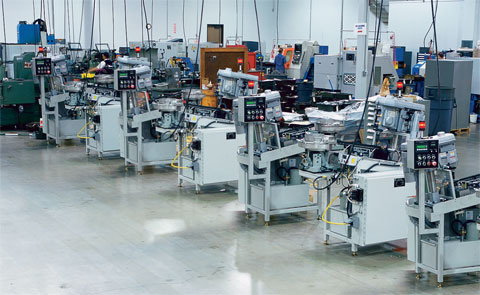
A series of CNC-threading machines are employed by ARP to accurately tap the threads in nuts. Tolerances held are 5 times better than aerospace standards.
Metal Finishing
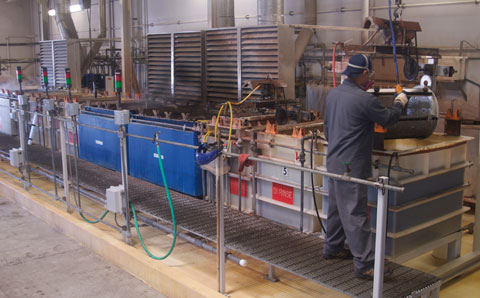
Metal finishing is also performed in-house at ARP. Operations include black oxide coating of chrome moly or polishing stainless steel to a brilliant luster.
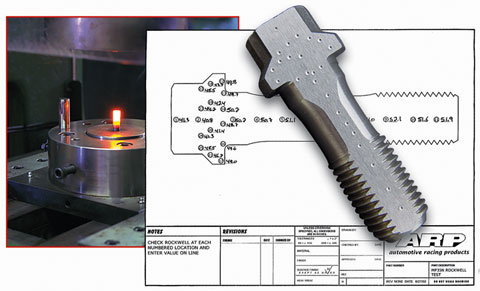
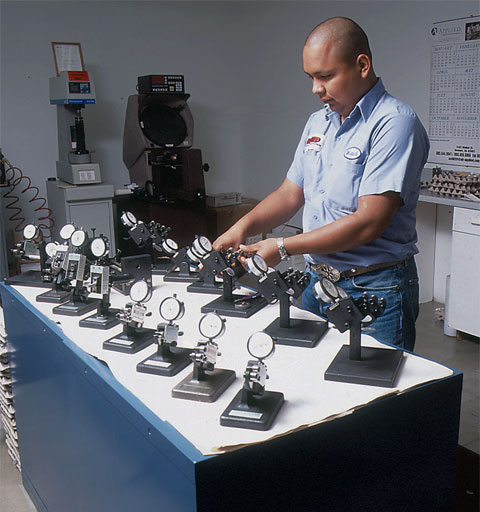
A series of special checking devices are employed to monitor the quality of threads. For every thread size, there is a checking device.
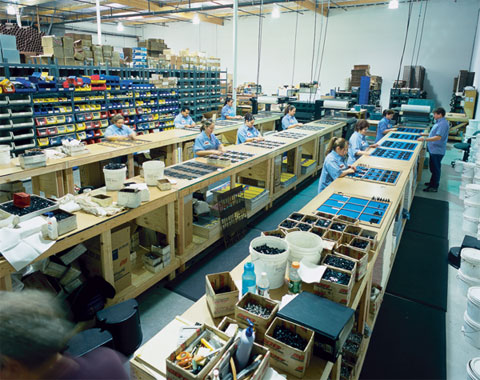
Components for each kit are placed on the appropriate display cards, sealed and labeled. Boxed kits are weighed on a special scale ensure that each kit contains exactly the right pieces.
Install Guide:

Warranty:


